Google Workspace Marketplace

A/B testing tool for wordpress™ | Nextlabs.io™
This tool is designed to assist companies and developers in updating WordPress™ post titles for testing purposes and to discover suitable titles.
Listing updated:May 23, 2026
Works with:
649


Overview
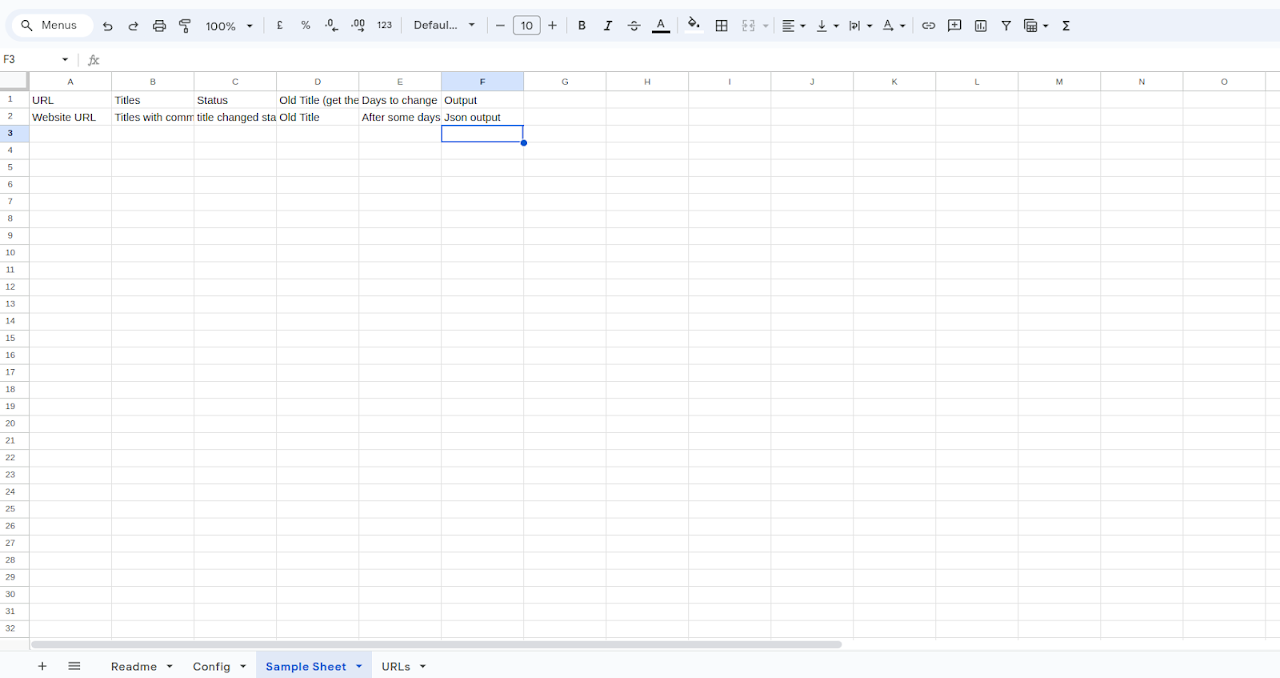
⚡ 𝗪𝗼𝗿𝗱𝗣𝗿𝗲𝘀𝘀 𝗔/𝗕 𝗧𝗲𝘀𝘁𝗶𝗻𝗴 𝗧𝗼𝗼𝗹 – 𝗦𝗽𝗿𝗲𝗮𝗱𝘀𝗵𝗲𝗲𝘁-𝗕𝗮𝘀𝗲𝗱 𝗧𝗶𝘁𝗹𝗲 𝗧𝗲𝘀𝘁𝗶𝗻𝗴 𝗠𝗮𝗱𝗲 𝗘𝗮𝘀𝘆

This 𝗪𝗼𝗿𝗱𝗣𝗿𝗲𝘀𝘀 𝗔/𝗕 𝘁𝗲𝘀𝘁𝗶𝗻𝗴 𝘁𝗼𝗼𝗹 is designed to help businesses, bloggers, and developers easily test different post titles and identify which ones perform best. With this WordPress A/B testing plugin, you can schedule title updates, track performance over time, and manage everything directly from a simple Google™ Sheet.

Whether you’re running A/B testing on WordPress blogs, e-commerce sites, or business websites, this add-on simplifies the process by automating title changes and recording logs for analysis.

🔹 𝗞𝗲𝘆 𝗙𝗲𝗮𝘁𝘂𝗿𝗲𝘀 𝗼𝗳 𝘁𝗵𝗲 𝗪𝗼𝗿𝗱𝗣𝗿𝗲𝘀𝘀 𝗔/𝗕 𝗧𝗲𝘀𝘁𝗶𝗻𝗴 𝗣𝗹𝘂𝗴𝗶𝗻

Update and rotate WordPress post titles automatically.

Track title change history with dates for accurate performance monitoring.

Run A/B testing for WordPress posts using a spreadsheet-driven workflow.

Schedule updates for specific URLs on chosen dates.

Manage multiple titles with custom intervals (daily, weekly, or any set number of days).

Free API token for integration, available at:
👉 Get API Token

🛠 𝗛𝗼𝘄 𝘁𝗼 𝗨𝘀𝗲 𝘁𝗵𝗲 𝗔𝗱𝗱-𝗼𝗻

Install the Add-on in your Google™ Sheet.

From the Add-ons menu, click Initialize Sheet to configure it for the first time.

Adjust config values:

Sheet Name – rename as needed.

Website URL – enter the site’s URL (must begin with http/https and be a WordPress site).

Edit the Sample Sheet:

Rename the sheet to match the “Sheet Name” column.

Enter multiple title variations separated by double commas.

Use the “Days to Change” column to set frequency (e.g., 1 = daily, 4 = every 4 days).

Login with your username & password via Add-on > Login.

Enter API Token via Add-on > Enter API Token.

Run the Sheet (first time only) via Add-on > Run Sheet.

Scheduled sheets will appear in the Config sheet (column B7).

Daily logs will be tracked automatically (column B8).

📌 Why Choose This A/B Testing Plugin?

✔️ Free to use

✔️ 100% online – no installation required beyond the Google™ Sheet add-on

✔️ No ads or watermarks

✔️ Designed specifically for A/B testing on WordPress

✔️ Built for flexibility – works for single sites or multiple WordPress projects

📩 Contact

Email: contact@nextlabs.io

Designed by nextlabs.io™

👉 Start running smarter experiments with our WordPress A/B testing plugin today and find the titles that truly boost engagement!
Additional information
sell
PricingFree of charge
code
Developer
Non-trader
email
Support
lock
Privacy policy
description
Terms of service
flag
ReportFlag as inappropriate


Search
Clear search
Close search
Google apps
Main menu